How to Automatically Scrape Structured Data and Save to Google Sheets
Contents
Any automated workflow needs to have storage steps where data can be deposited and accessed by other programs. Web scraping—especially when scheduled as a recurring task—is the same. The information you gather needs to be stored in a safe, accessible, and organized way.
A proper data storage step helps you build better workflows by increasing speed and accuracy. Even if you aren’t a coder, you can use a workflow automation program like Zapier to avoid having to manually pass information from one program to the next.
In this tutorial, you’ll learn how to use Browserbear to scrape structured data, then Zapier to automatically send it to Sheets so it can easily be accessed.
What is Browserbear?
Browserbear is a cloud-based tool for automating web browsing tasks that you can use to save structured data, capture screenshots, and perform other browser actions.
Using Browserbear, you can easily automate tasks based on specific conditions with a workflow triggered using the REST API or no-code tools such as Zapier and Make. By integrating this task with other tools, you can save, manipulate, and optimize your data. This frees you from manual, repetitive work and allows you to focus on more important tasks.
What is Google Sheets?
Sheets is a cloud-based spreadsheet app included in the Google Workspace product suite. It allows users to create, edit, and collaborate on spreadsheets for free, making it an affordable alternative to many other database management systems.
Google Sheets is an option worth considering if you’re in need of a lightweight, cloud-based environment to store scraped data. It may not have heavy-duty data manipulation capabilities or scale beyond a certain size, but it’s suitable for many simpler use cases. The Sheets API also allows you to seamlessly integrate and send data between programs for a hands-free workflow.
What You Will Create
Once a webpage is scraped with Browserbear, the data needs to be sent to Google Sheets so it can be easily accessed and used in other workflows. We’ll set up a task to scrape data, then create a zap that triggers whenever a task run is completed, automatically depositing the payload in Sheets.
The tools you will be using are:
- Browserbear : To create a browser automation that scrapes blog card information
- Google Sheets : To store blog card information
- Zapier : To trigger actions in different programs based on pre-specified commands
By the end of the tutorial, you should be able to automatically send scraped data from Browserbear to a Sheets spreadsheet:
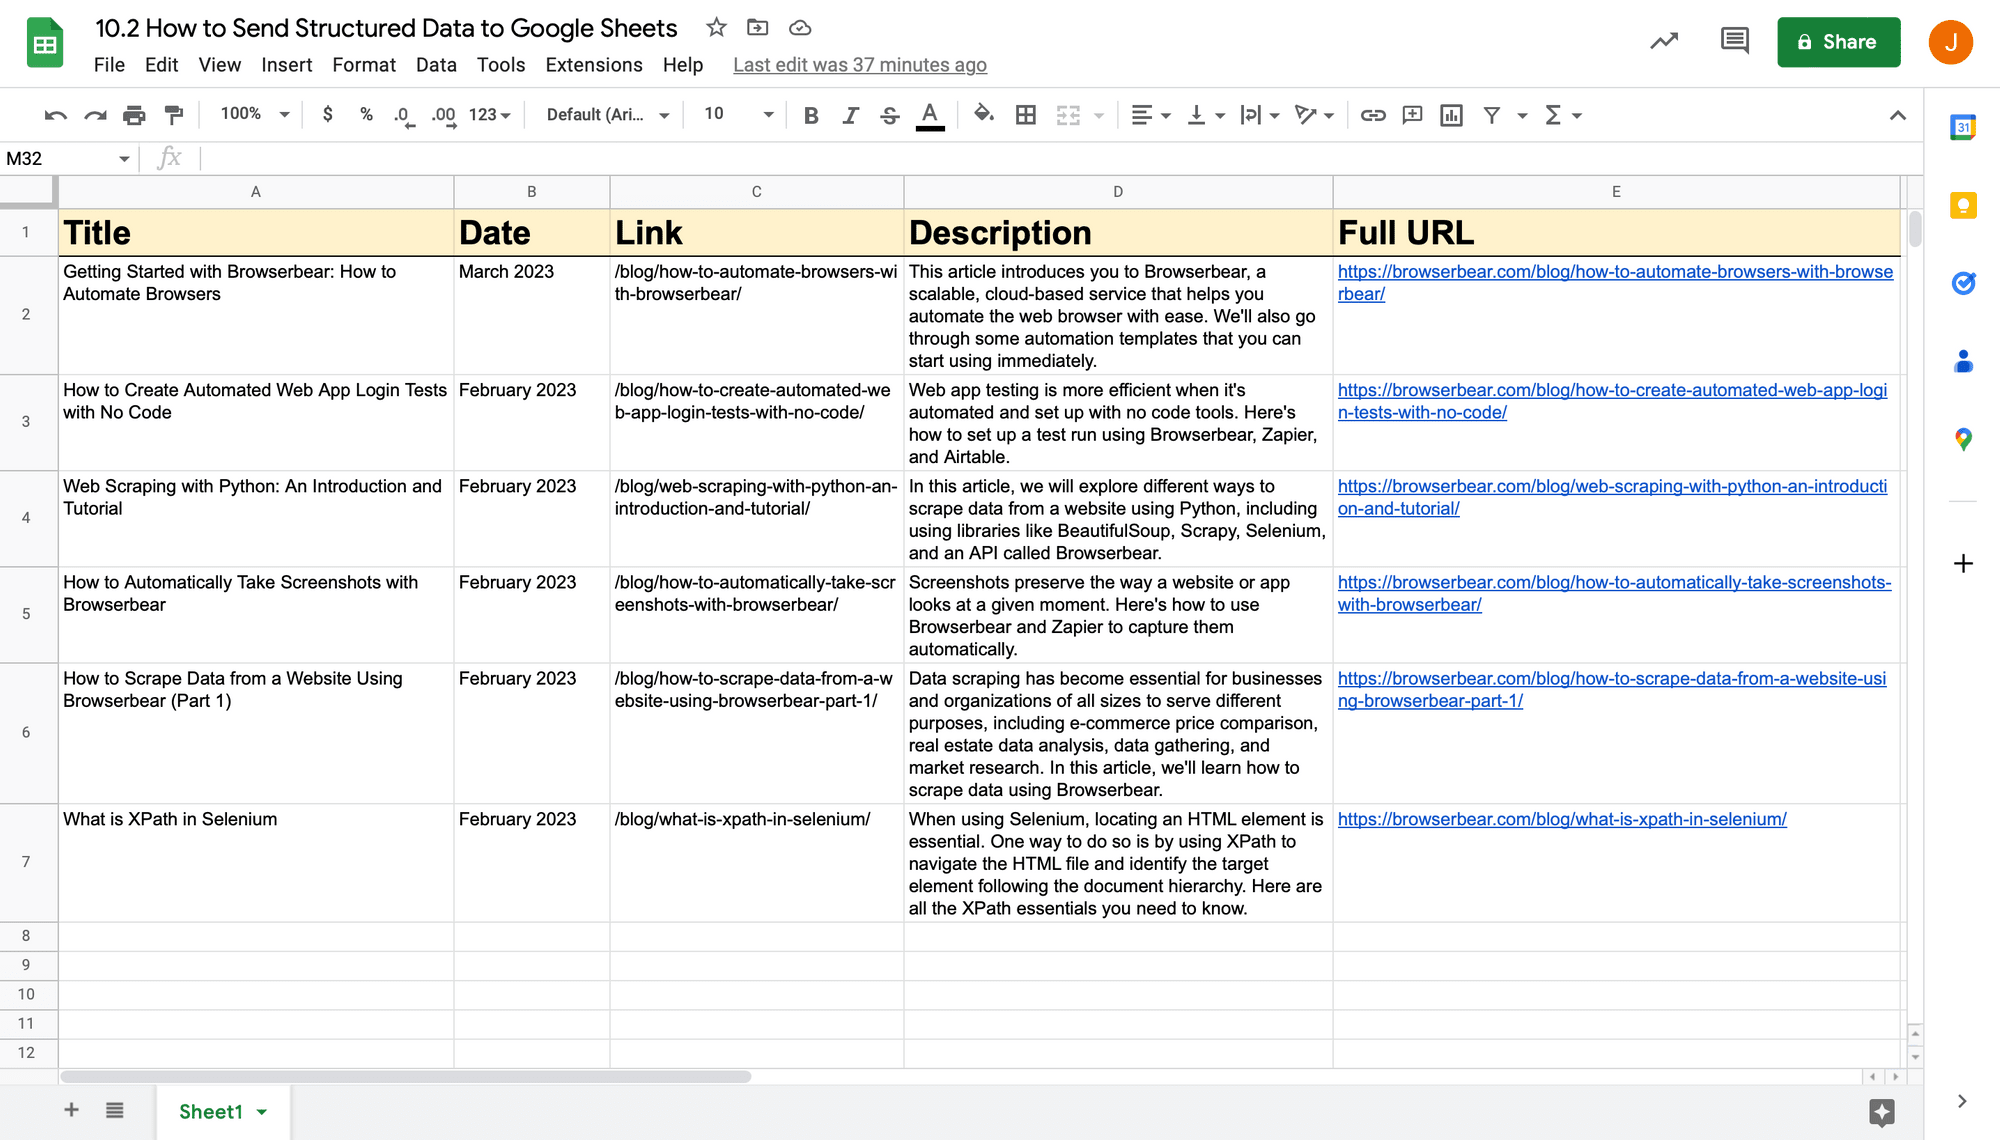
We’ll automate the process by setting up a Browserbear task, Google Sheets spreadsheet, and Zapier workflow.
How to Send Scraped Structured Data to Google Sheets
Sheets is a spreadsheet software that you can supercharge using formulas, add-ons, and the API. While knowledge base apps like Notion and Airtable might be more free-flowing and customizable to your use case, Sheets can be fantastic for summarizing and manipulating data.
One of the biggest advantages of using Sheets over other apps for scraped data is that it can be used for bulk import. Since Sheets organizes data using cells (as opposed to records or database items, in the cases of Airtable and Notion, respectively), you can add any number of items in a JSON array at any time using a single Zapier request.
Here’s how to set up a workflow that sends scraped structured data to Google Sheets:
Create a Browserbear Task
Log into your Browserbear account (or create a free trial account for 5 mins of cloud runtime—no credit card required! 🐻🎉).
From the Tasks tab, click Create a Task. Name it, then click Save.
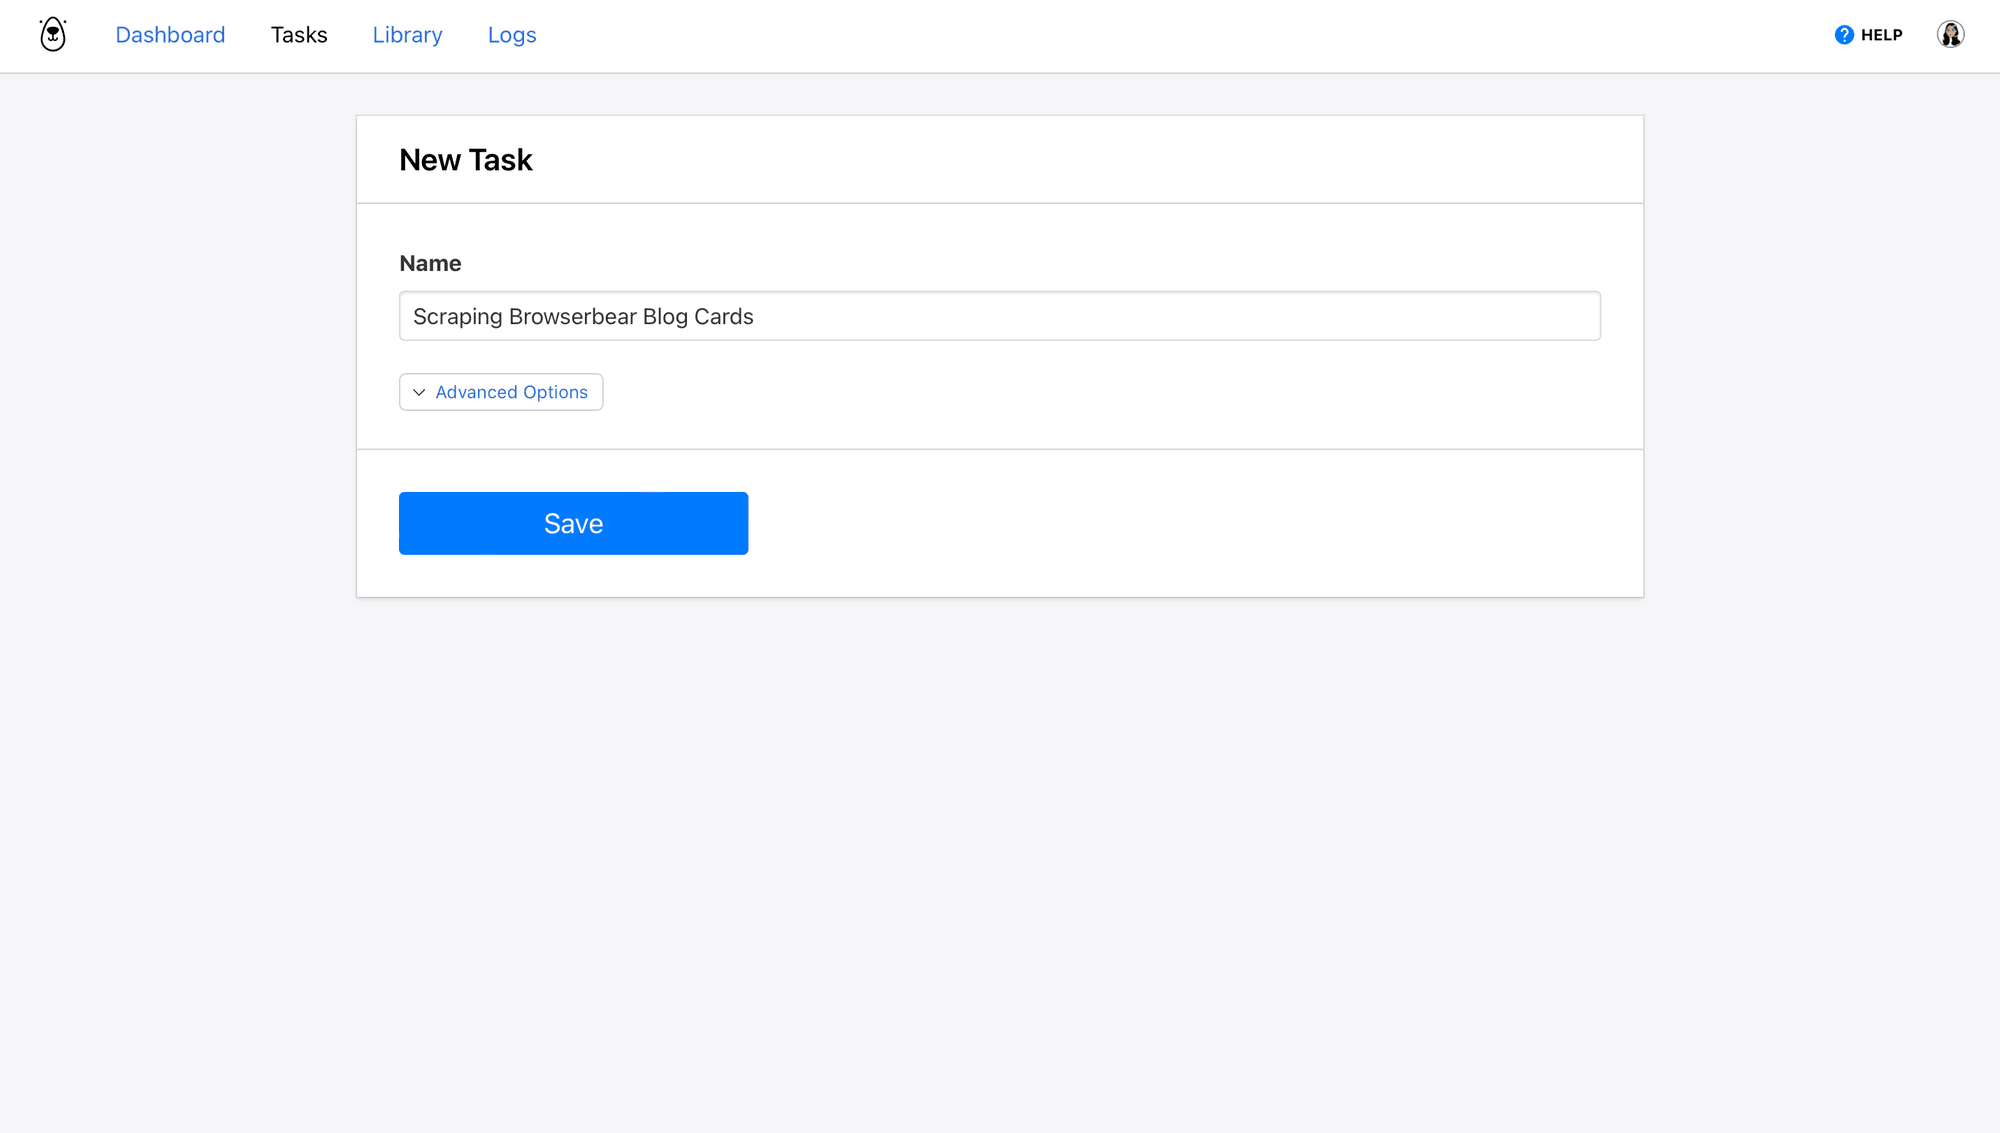
The task page you’re now on is where you can add steps, run the automation, and view logs of completed runs.
Click Add Step and set up the following actions:
Step 1: Go
The first step will direct Browserbear to the site you will be scraping from.
Choose go as the Action and insert a destination URL. Choose network idle as the wait instructions. This option waits until no new network requests are made for 500 ms and is usually the safest. You can also use load or domcontentloaded if it’s more suited to your use case.

Click Save.
Step 2: Save Structured Data
The second step tells Browserbear which items on the destination page you want to collect data from. We’ll use an action to define a container and the elements you want to scrape within it.
Bear Tip 🐻: You’ll only need to set up the scraping process for one container—it will then apply to all others on the page that contain the same elements.
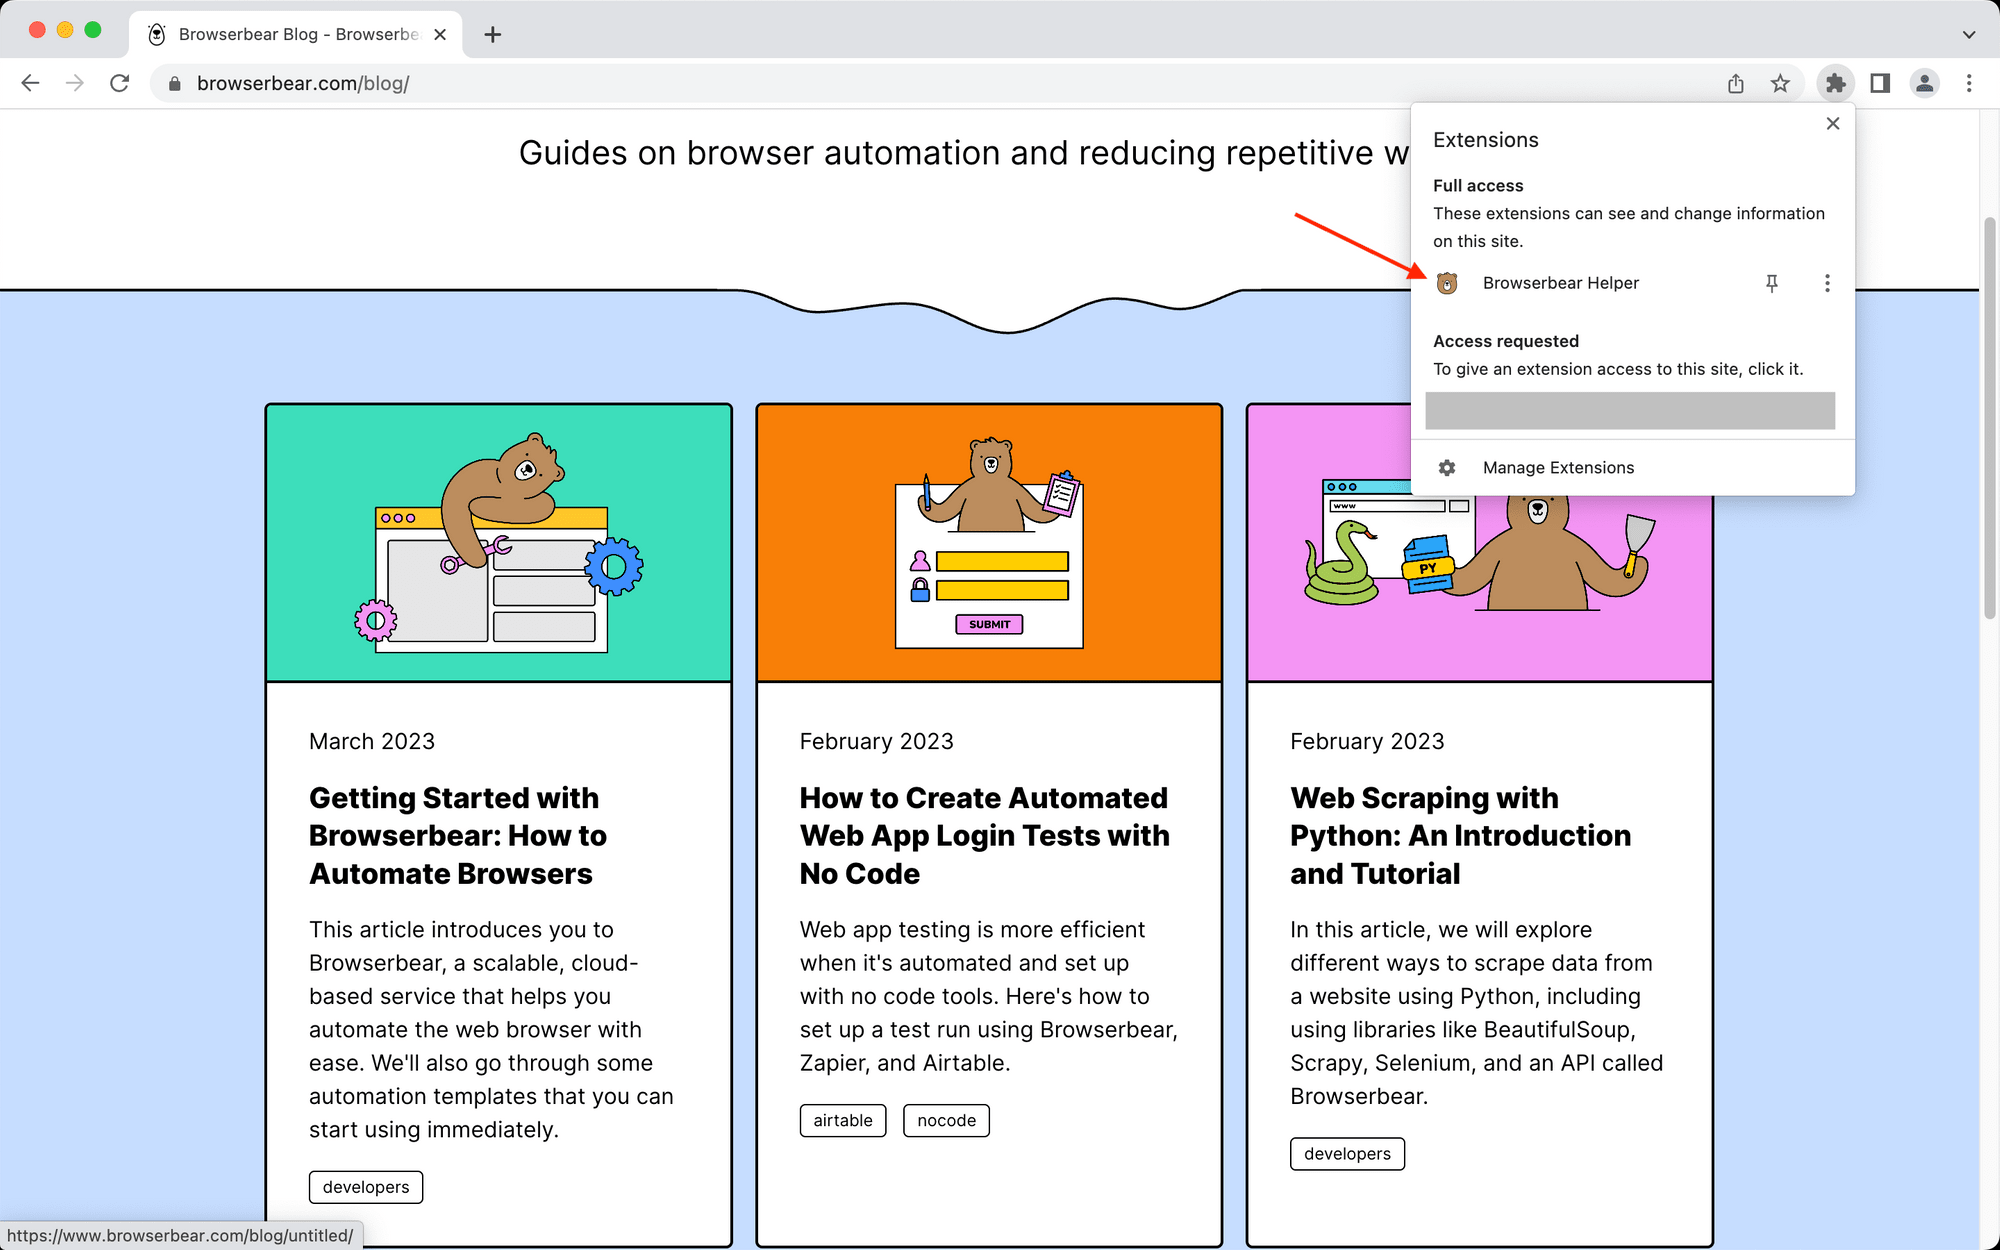
The Browserbear blog page has six blog cards. Let’s set up a scraping action for the first one.
Choose save_structured_data as the Action.
The Browserbear Helper Chrome extension will select help you select website elements for your task. Activate the extension on the fully loaded destination website.
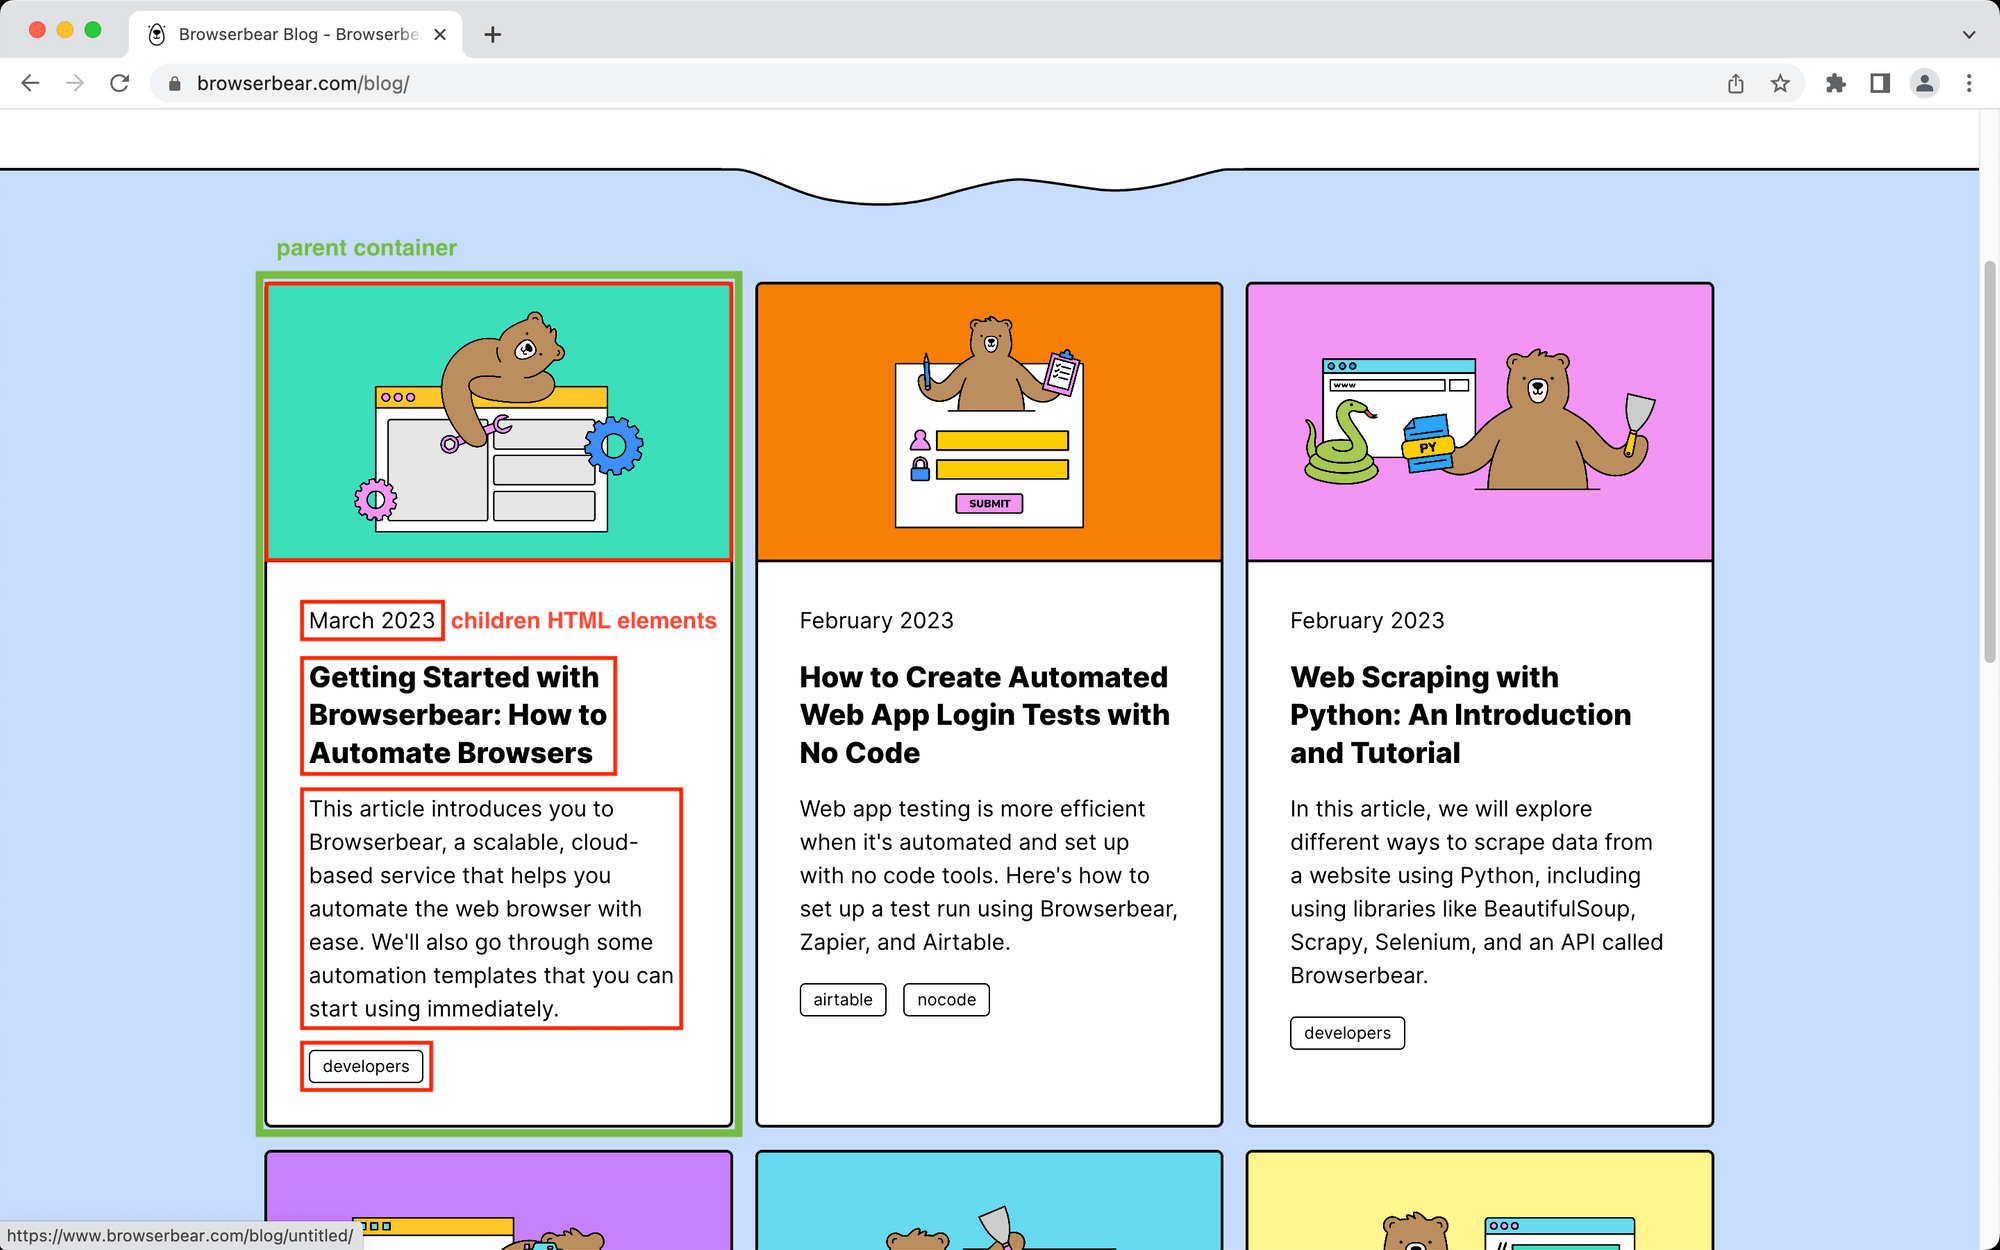
Locate the parent container you’re defining and hover over it. You should see a blue outline.

Click on the outlined selection, then copy the config that appears.
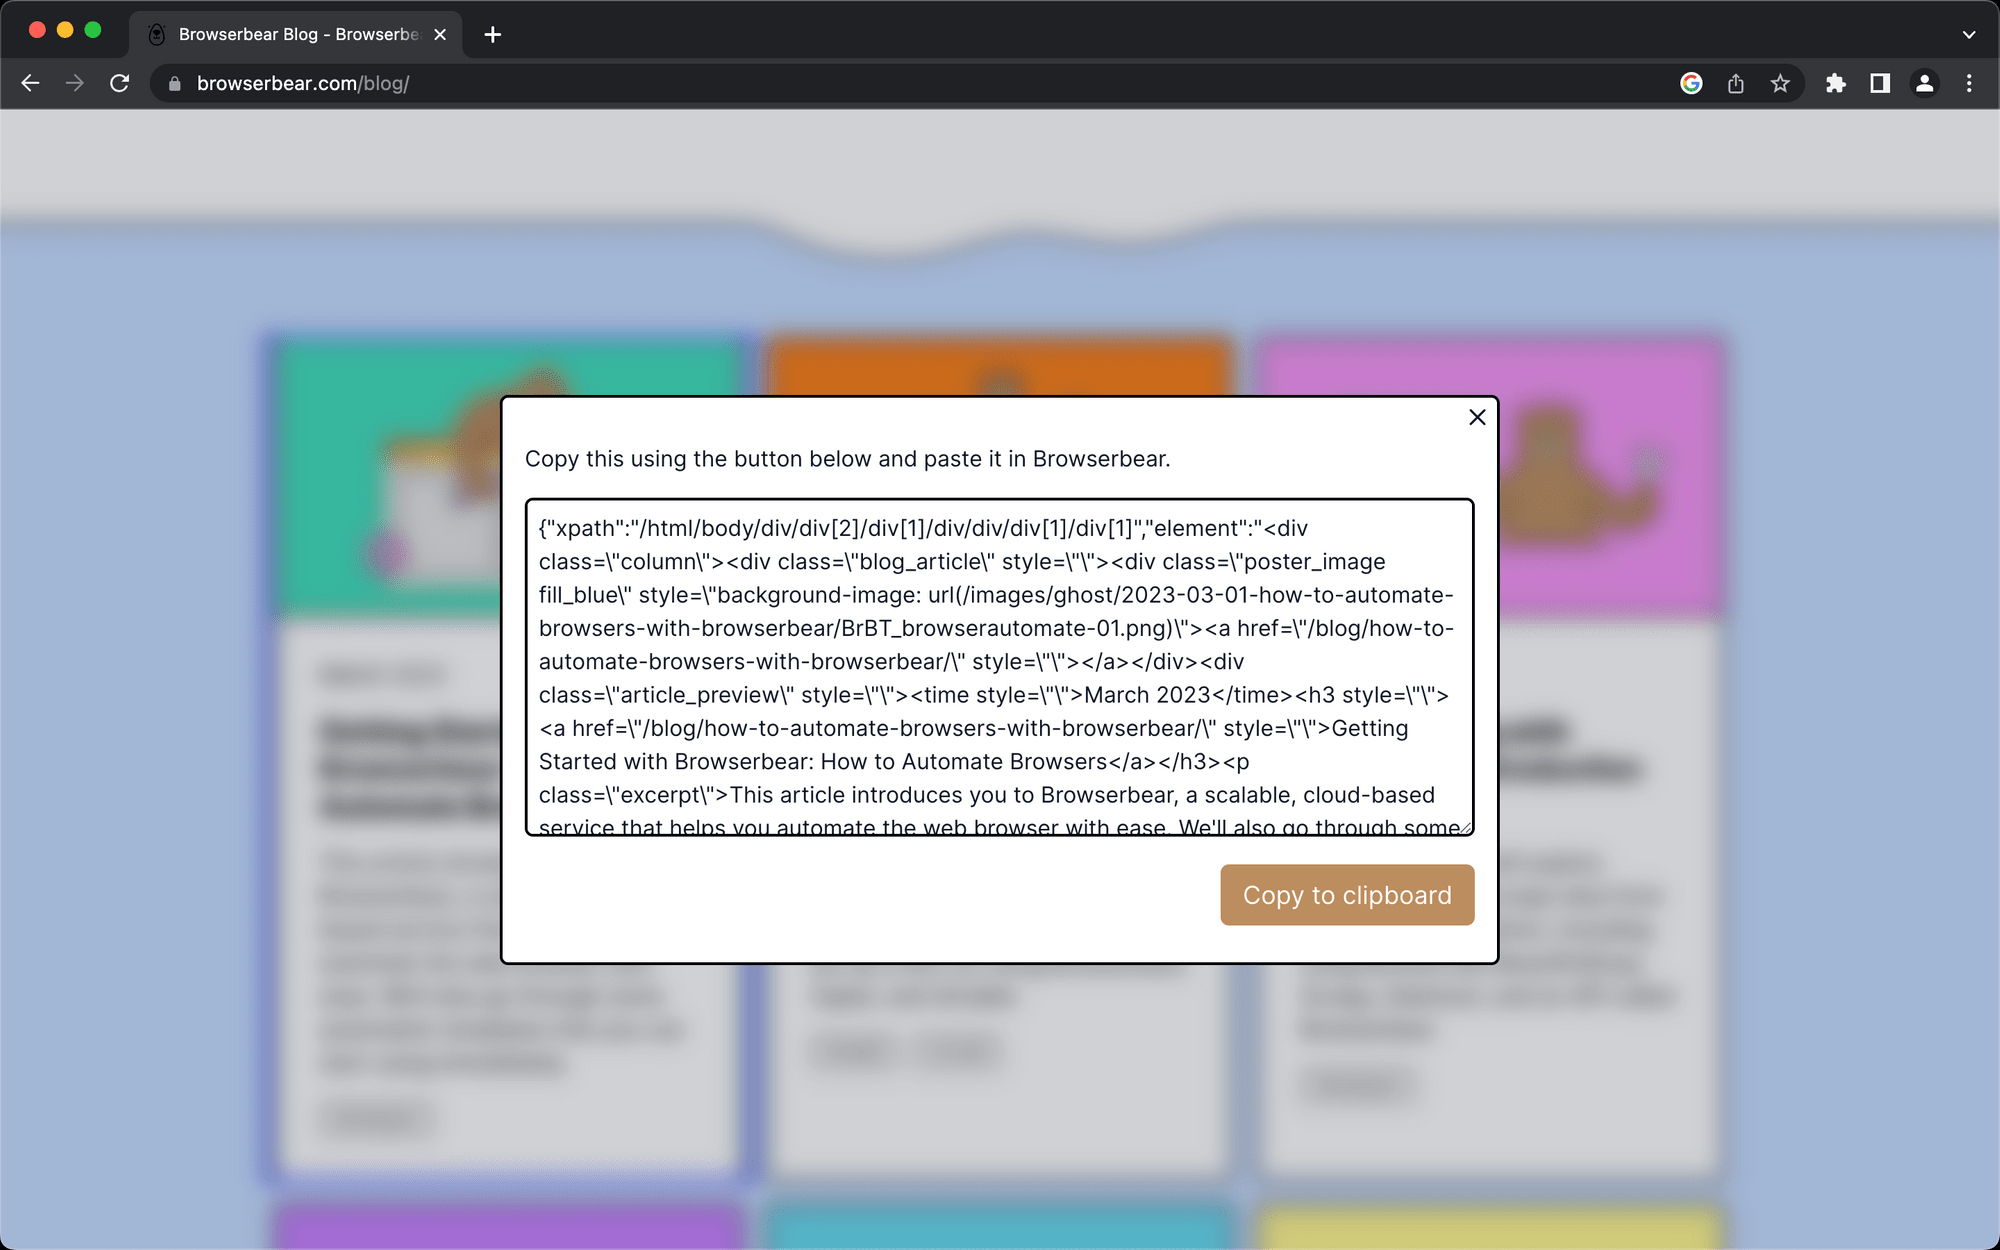
Return to your Browserbear task setup and insert the code into the Helper section.

Now that we have a parent container selected, let’s identify the individual HTML elements within it that you want data scraped from. Return to the destination site with the Browserbear Helper extension activated, hover over the element you want to select, and click when you see a blue outline surrounding it.
Copy the config into the Helper Config section of the Data Picker. Add a name and specify the type of data you want to extract. The default is text, but you can also save links, images, URLs, and much more.
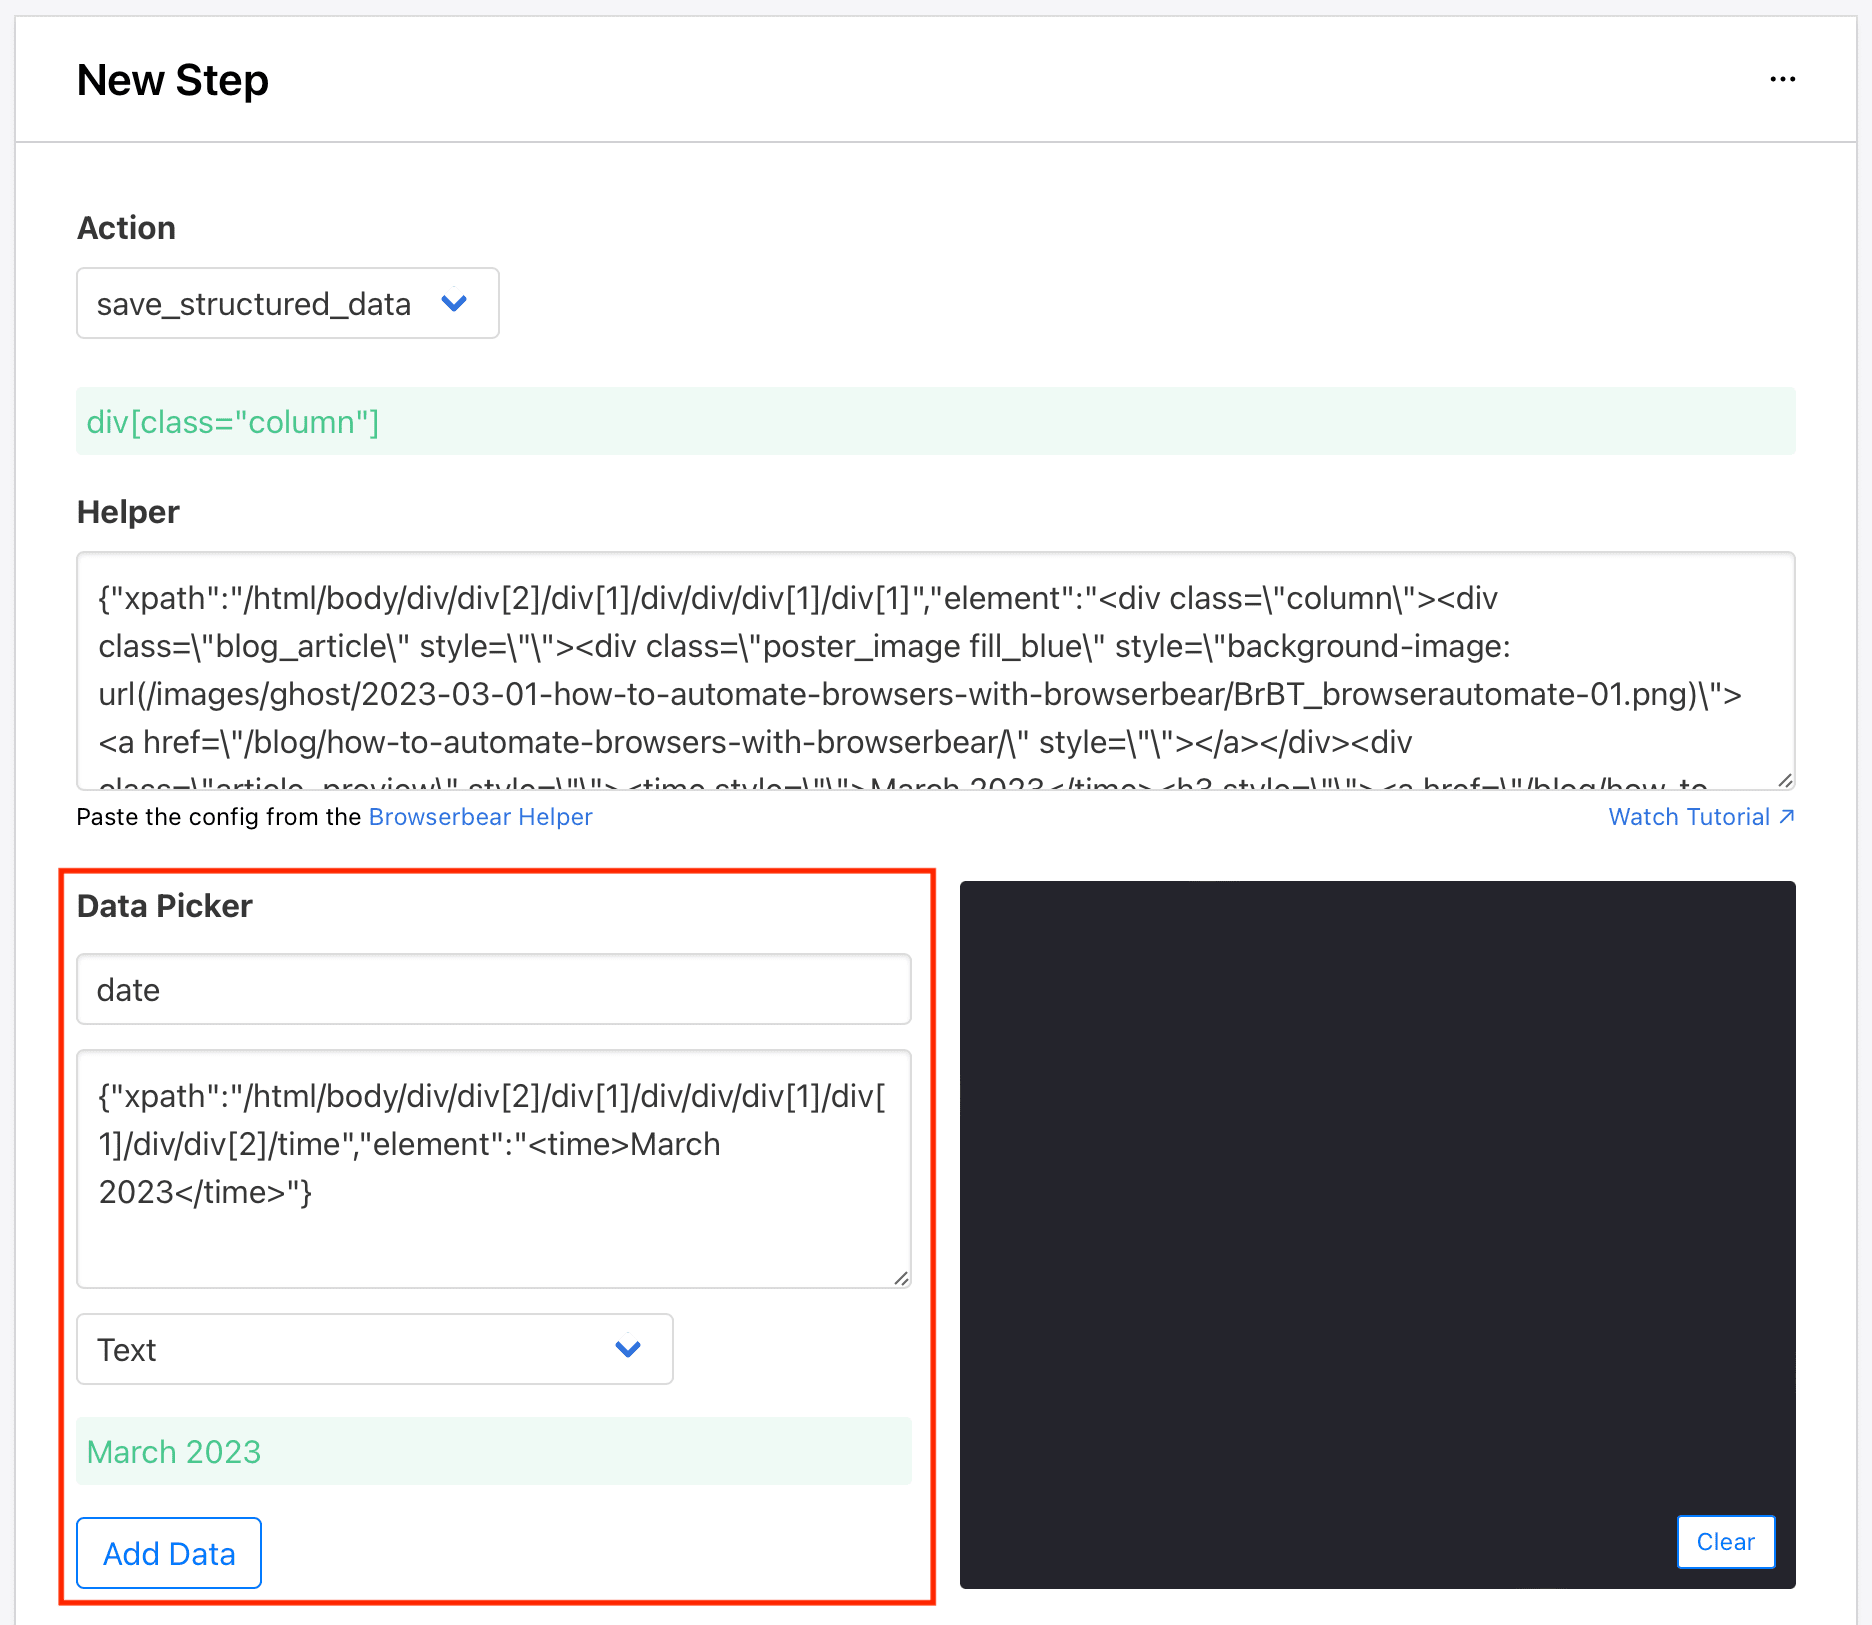
Click Add Data when you’re done.
Repeat this step for as many HTML elements as needed.
Once you’ve loaded all of the elements you want to scrape on the log, click Save.

Click Run Task from the task page to test your automation.
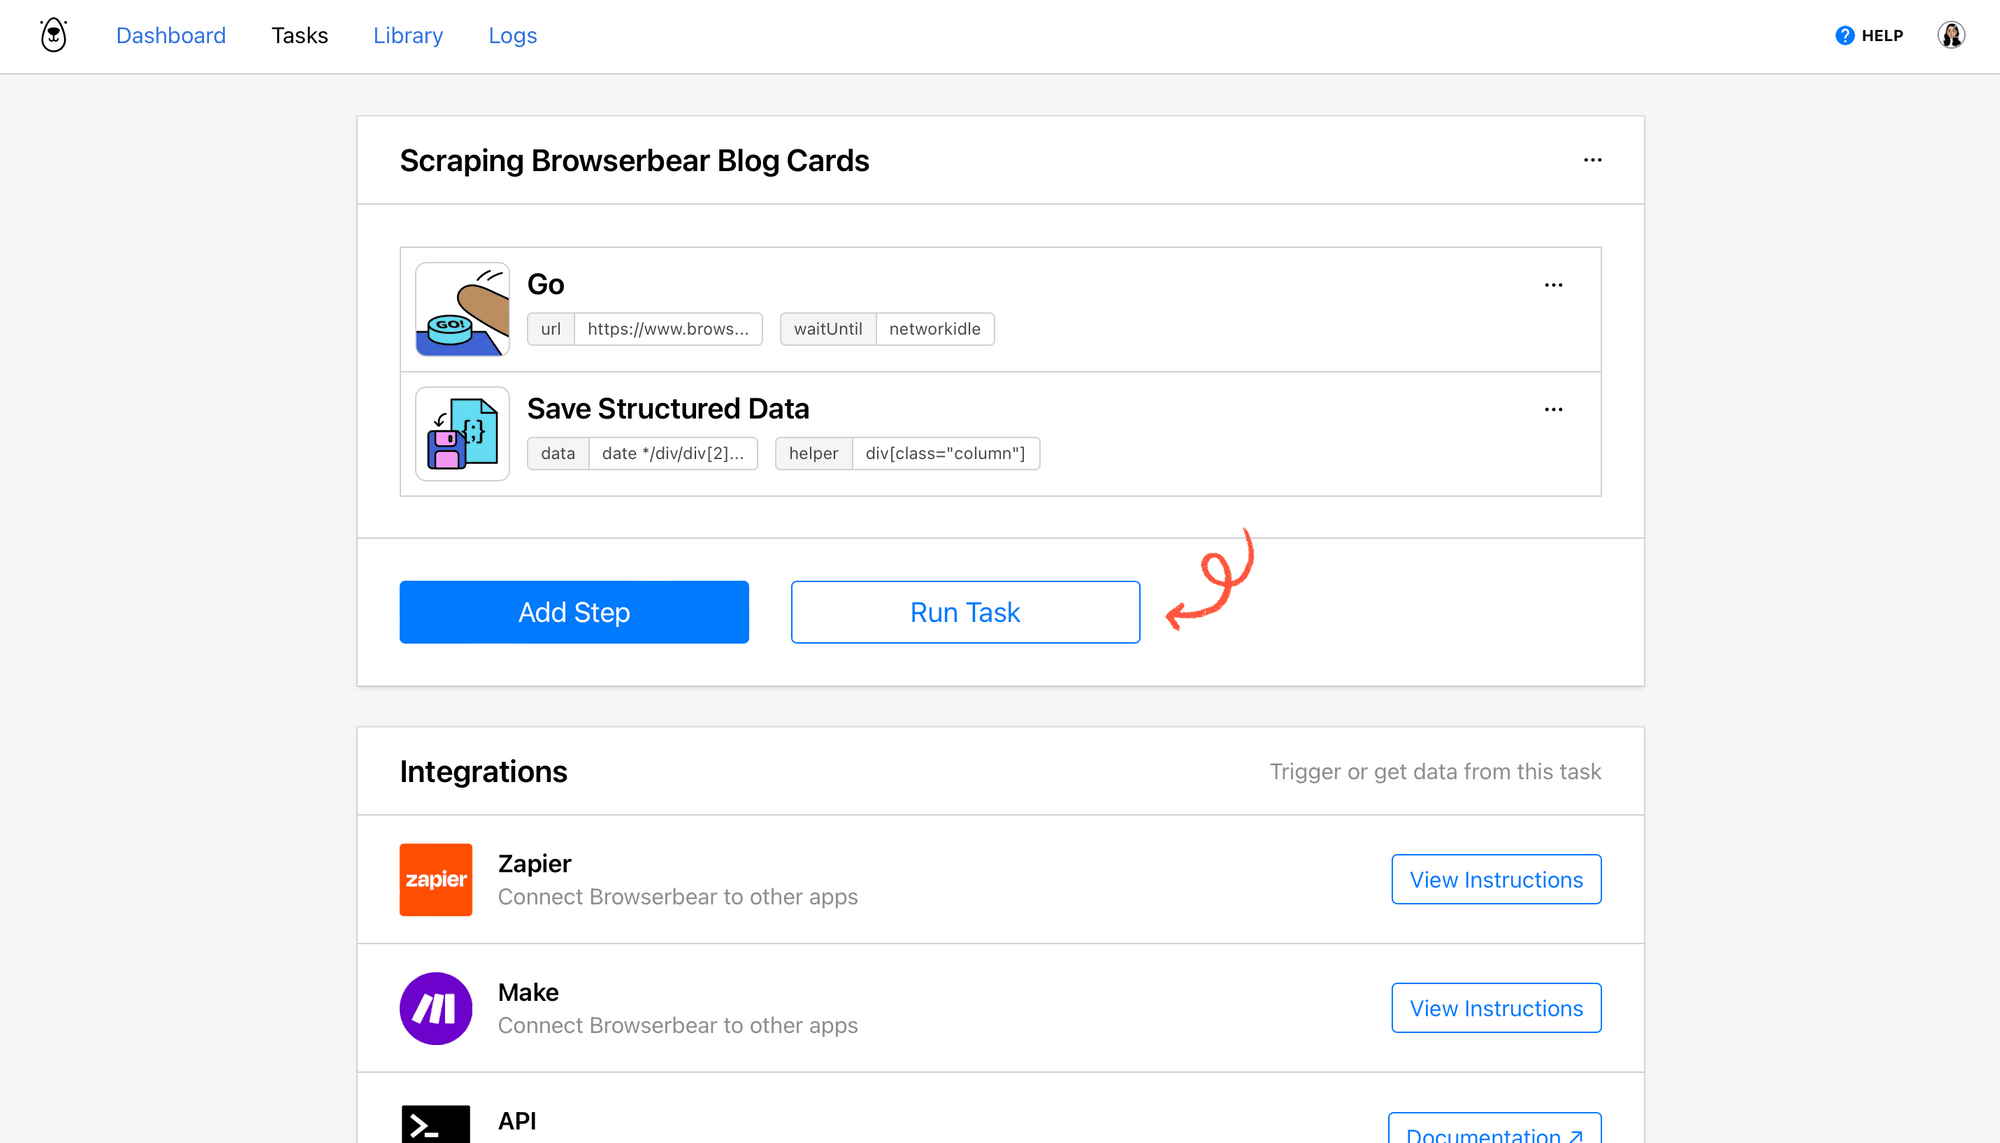
A result should now appear in the Runs section.
Click Log to see the output.
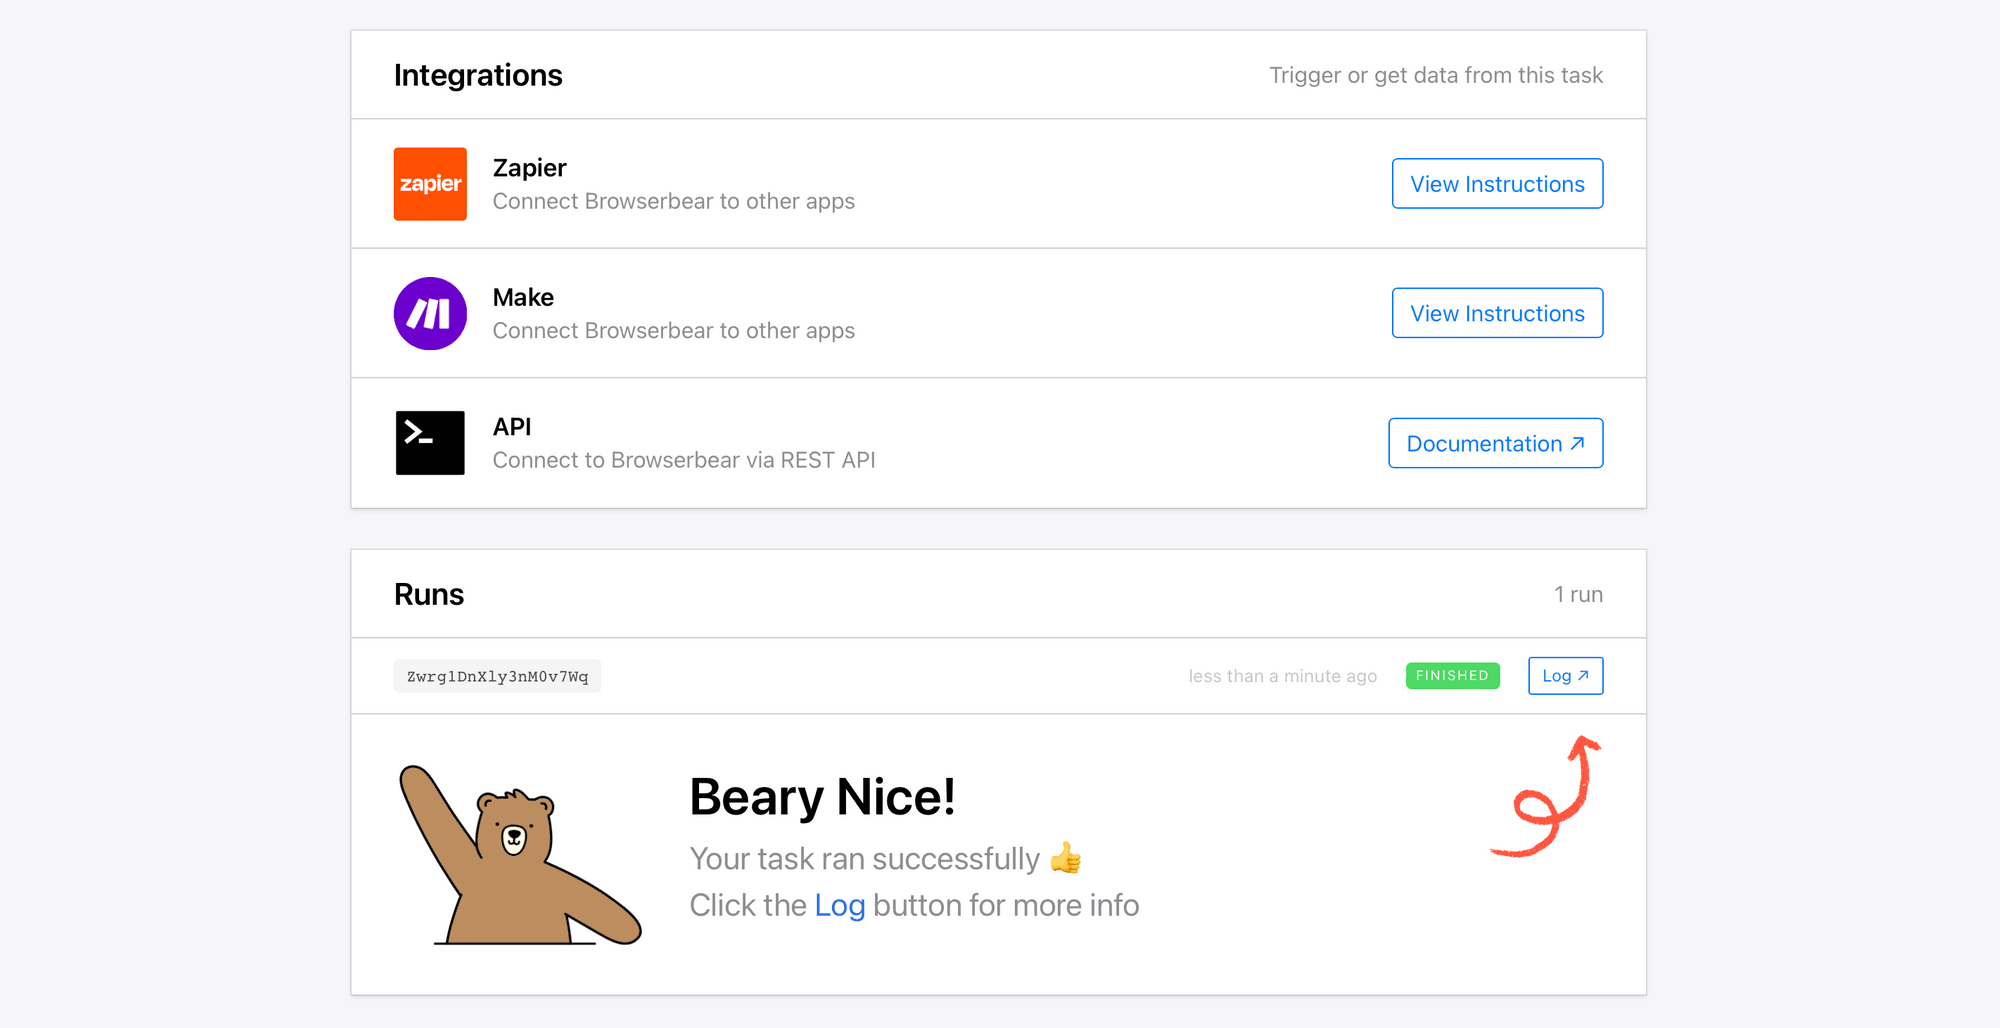
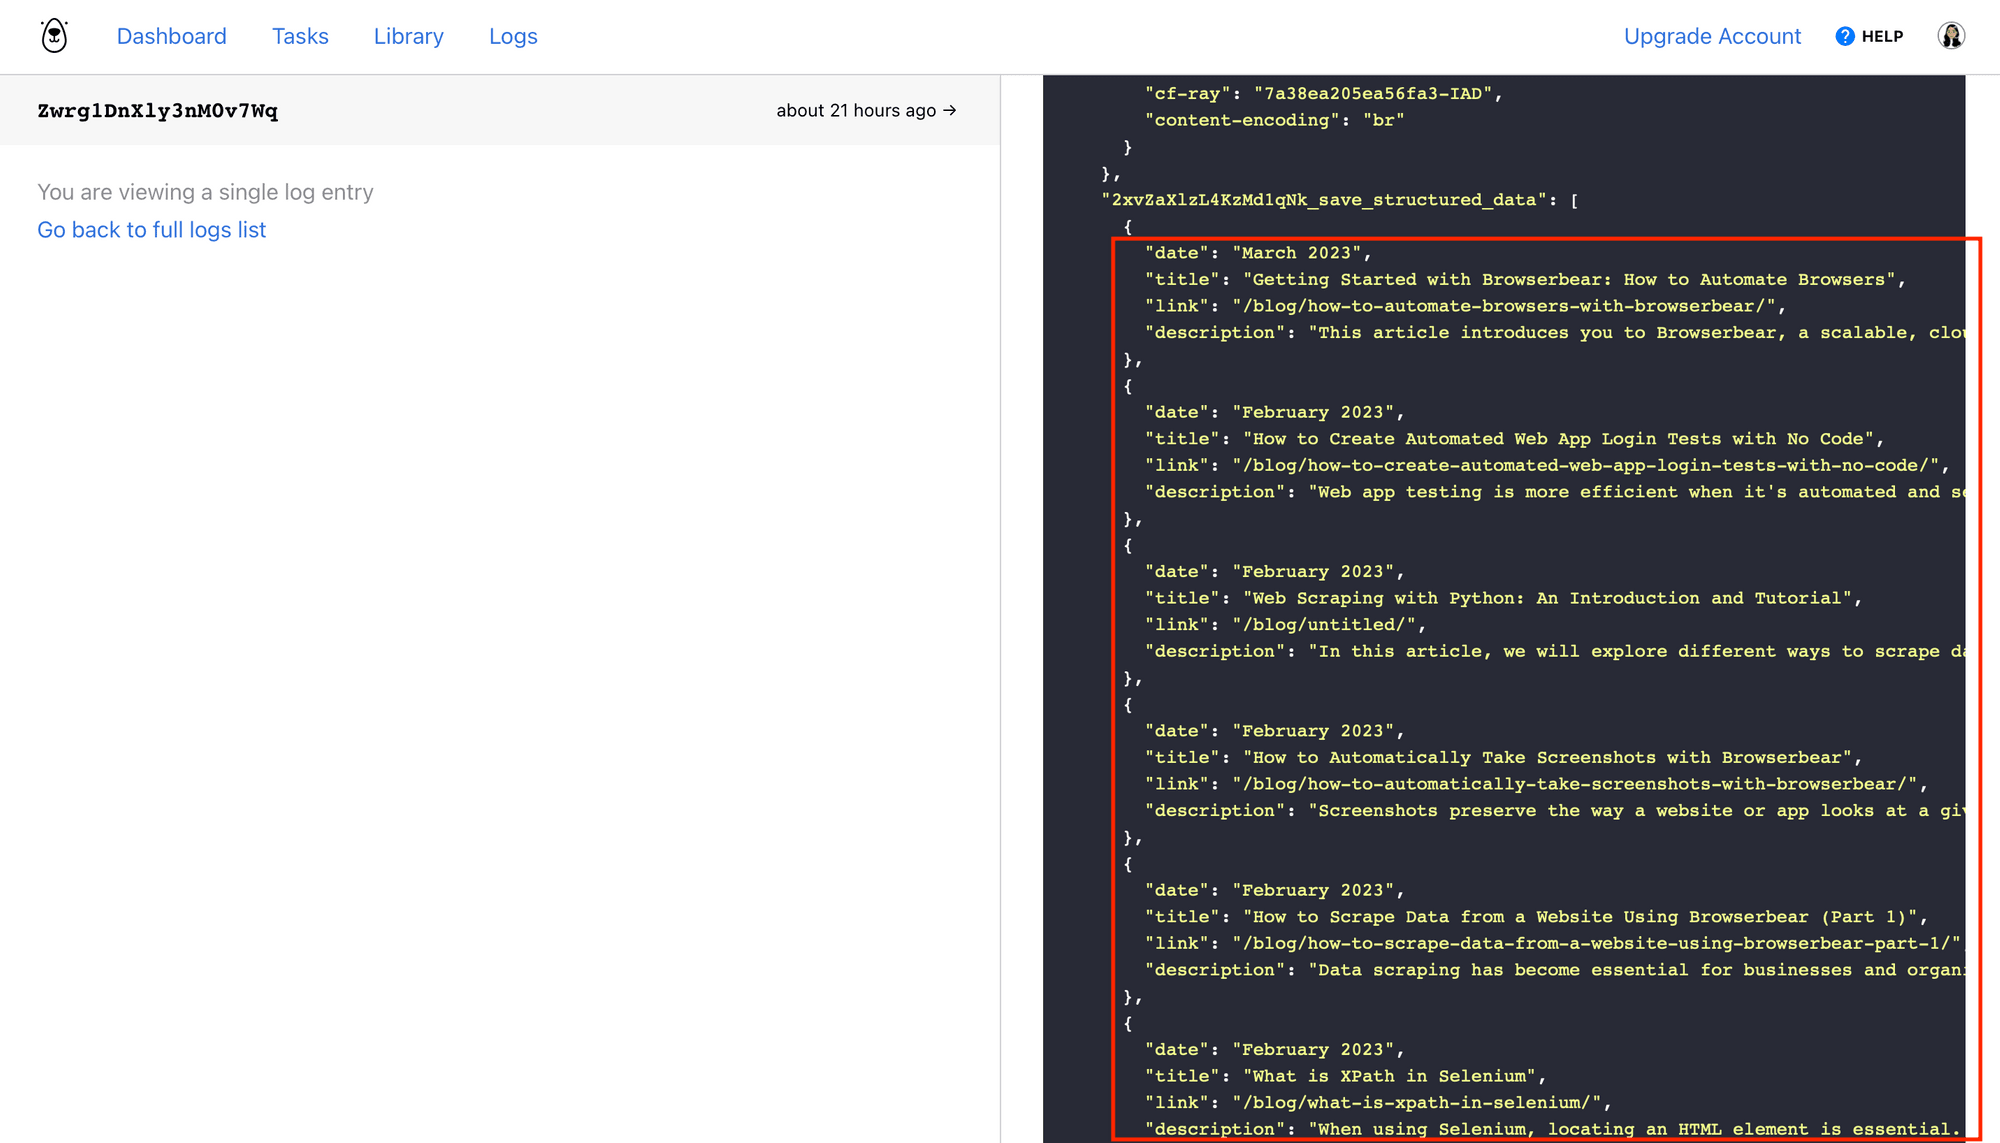
You should see your scraped data appear in the output section.
Your task is ready! Let’s set up a spreadsheet for the payload and a zap to bring it all together.
Build a Google Sheets Spreadsheet to Store Scraped Data
A Sheets spreadsheet will store your scraped data and make it easy for you to access whenever necessary. Since it’s online, you can view it across multiple devices.
Log into Google Sheets and click on the + symbol to create a new blank spreadsheet.

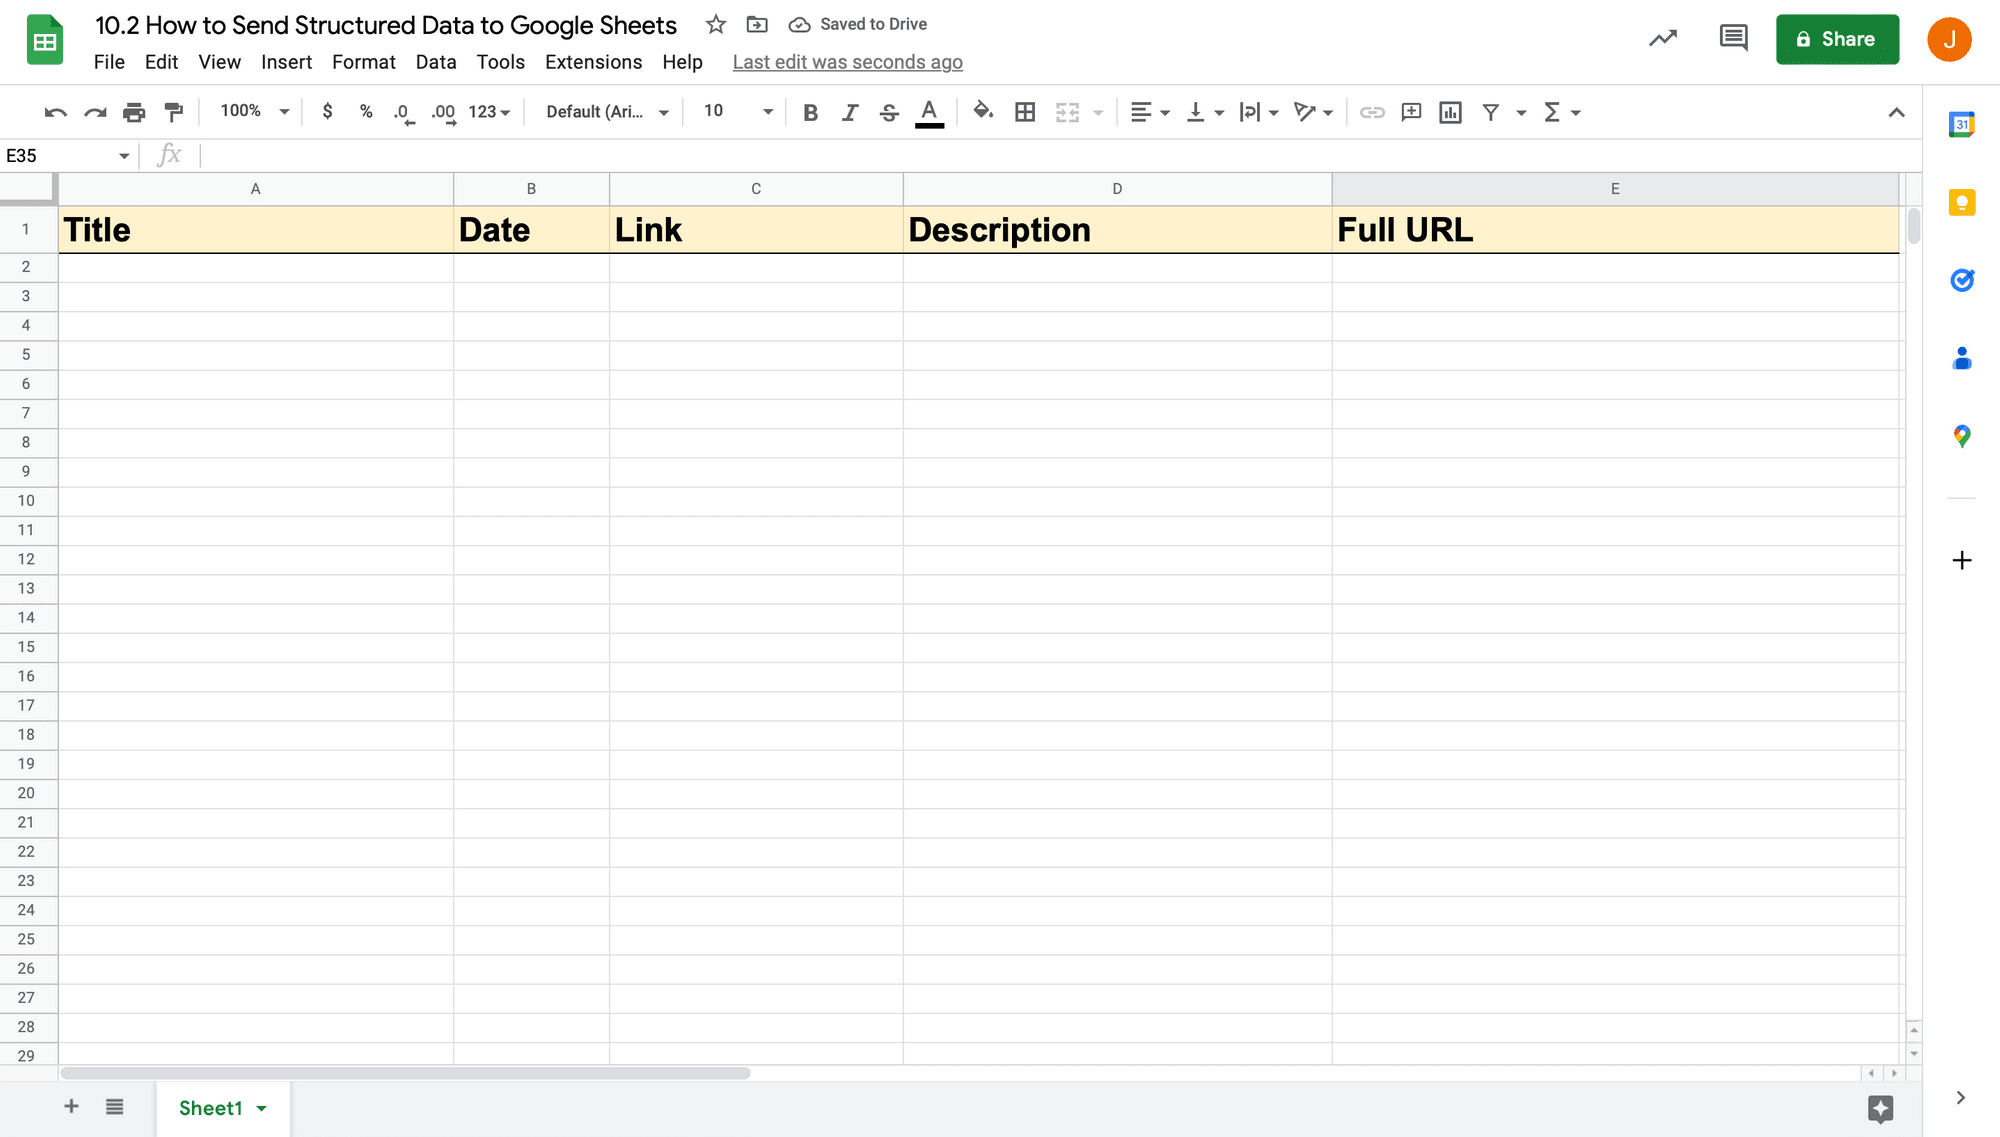
Row 1 will be our header row. Insert the following text into their corresponding cells:
- A1: Title
- B1: Date
- C1: Link
- D1: Description
- E1: Full URL
Format the header row however you’d like.
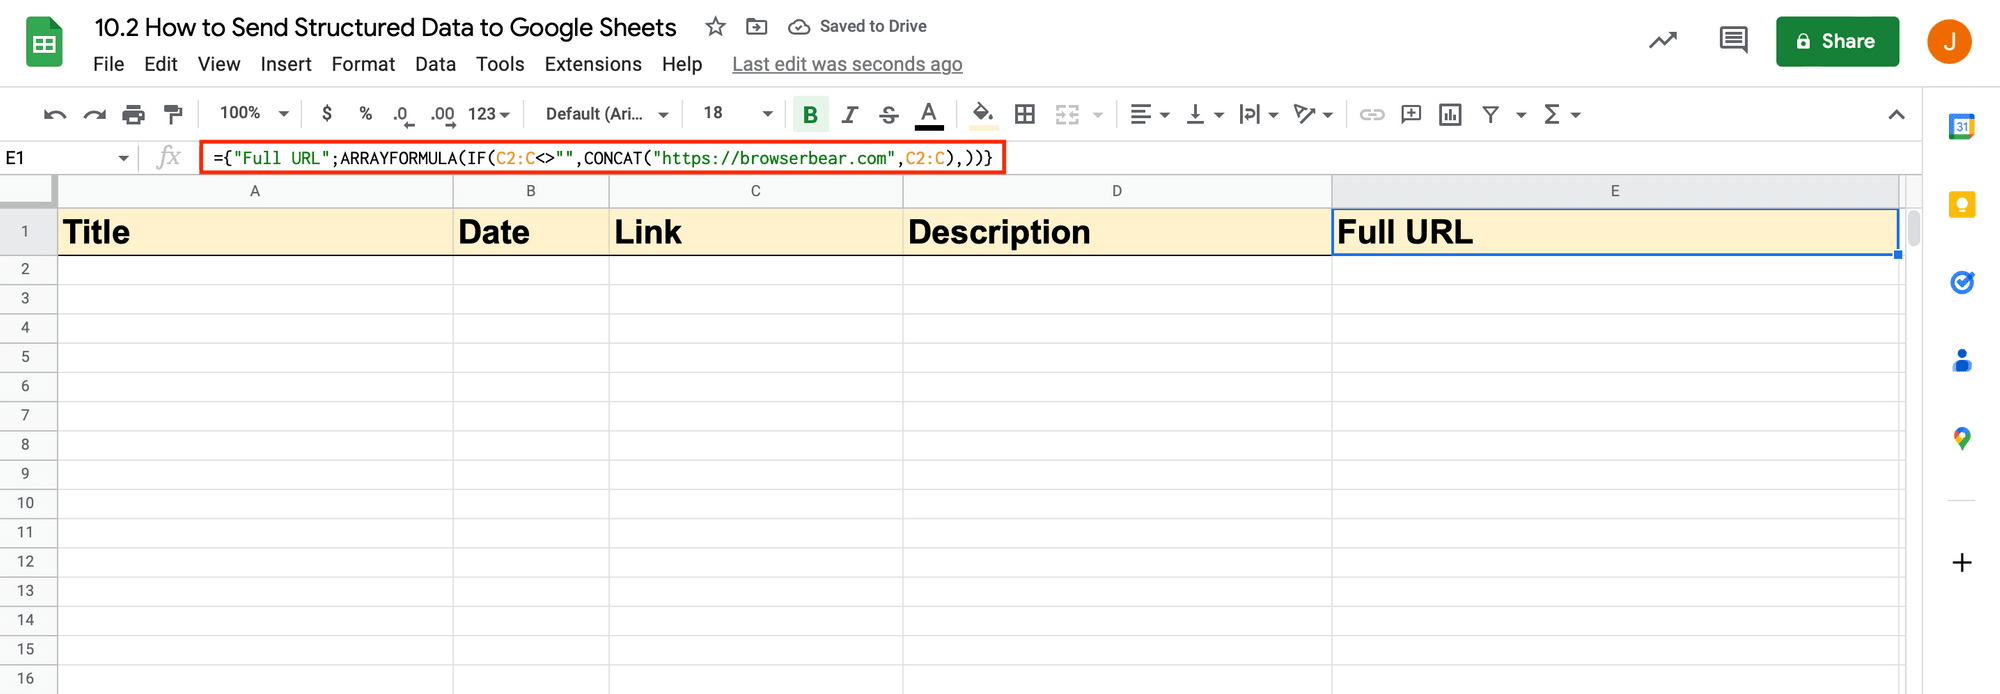
The full URL column is included simply because the link scraped from Bannerbear is only the file path and does not include the domain. Let’s use ARRAYFORMULA to combine the two and create a clickable link.
With cell E1 selected, insert the following into the formula bar: ={"Full URL";ARRAYFORMULA(IF(C2:C<>"",CONCAT("https://browserbear.com",C2:C),))}.
Just like that, your spreadsheet is ready to use!
Set up a Zap to Save Scraped Data
The zap we set up will trigger when a run is completed in Browserbear, sending the output to your spreadsheet.
Log into your Zapier account, click + Create Zap , and set up the following events:
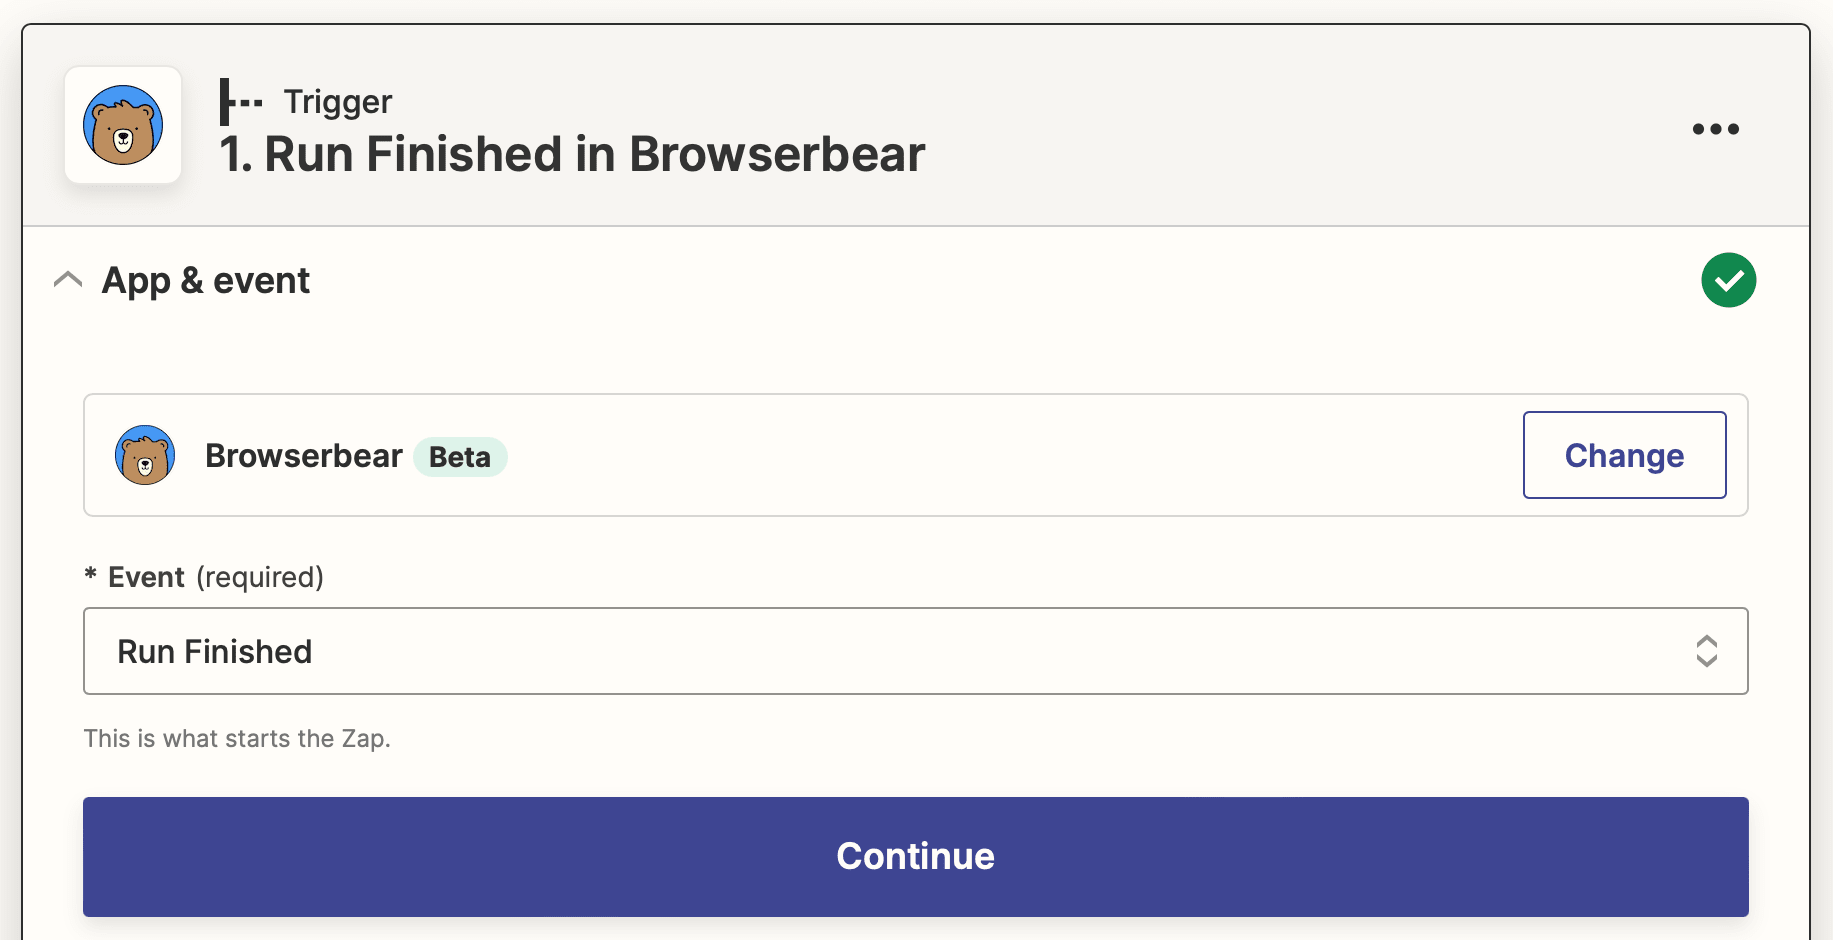
Trigger: Run Finished in Browserbear
Choose Browserbear as the app and Run Finished as the event. You’ll need to connect your Browserbear account using your API key.
In the Trigger section, select the corresponding task.
Test the trigger to make sure Zapier is able to find a completed run.
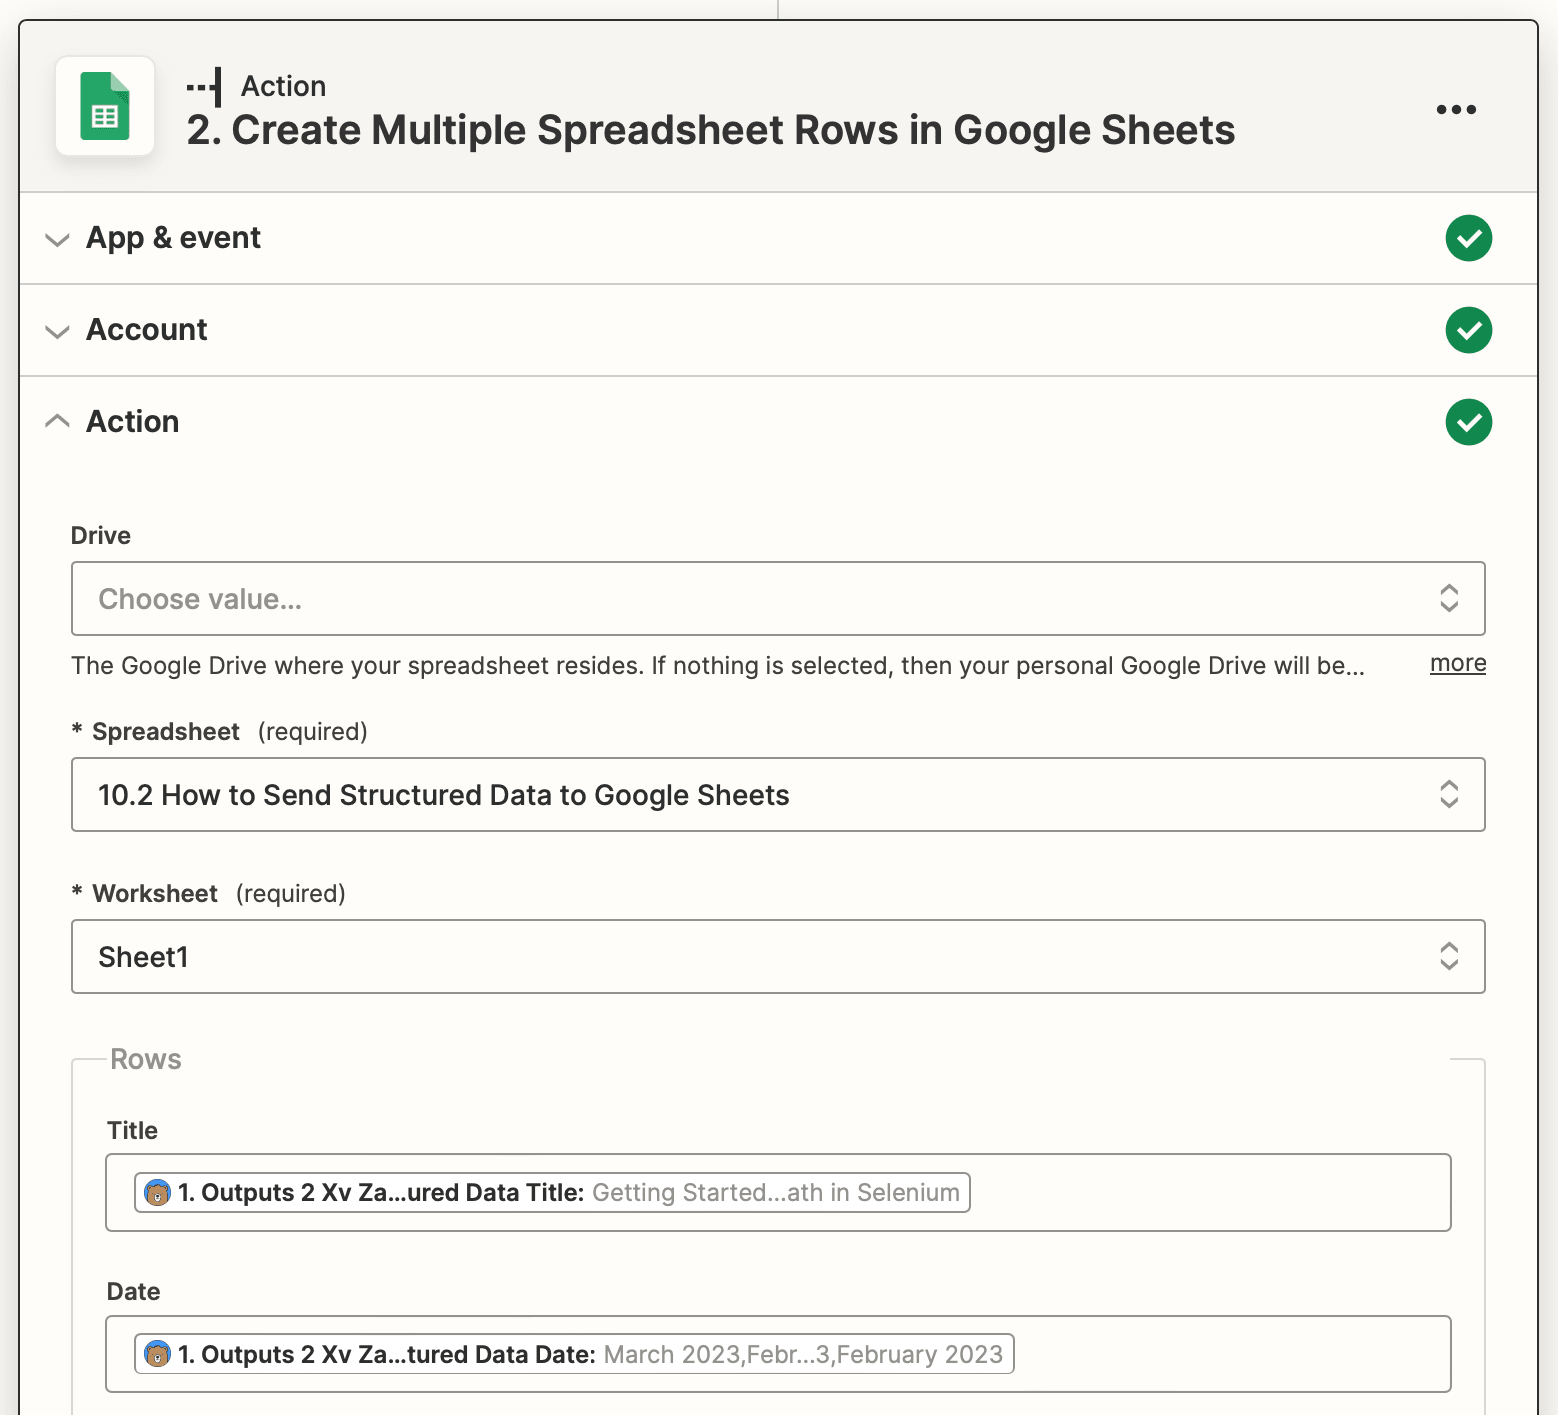
Action: Create Multiple Spreadsheet Rows in Google Sheets
Choose Google Sheets as the app and Create Multiple Spreadsheet Rows as the event. You will be prompted to login to your Google Sheets account if you haven’t connected it yet.
Set up the action by selecting the corresponding Spreadsheet and Worksheet. Map the scraped output to their matching headers.
Test the action, then check to see if the information is successfully sent to your spreadsheet.
Note that you might have to make some adjustments to your formula and formatting with the first batch of data, but any subsequent batches should follow the same format.
Make any final adjustments, then hit Publish to take your zap live!
Bear Tip 🐻: You will need a separate automation that triggers the task run as frequently as needed. Consider setting up a different zap to schedule it on a recurring basis or in response to a certain event.
Be Smarter with Your Scraped Data
It’s one thing to successfully scrape data from a webpage—and quite another to create a fully automated workflow that stores and makes use of that information. Fortunately, there are so many no code solutions out there that make it possible to do this even with limited technical knowledge.
As one of Google’s suite of Workspace apps, Sheets is a versatile program that works beautifully for larger payloads. But if you’re looking for other ways to store scraped data, consider the following:
👉🏽 How to Automatically Send Structured Data to Airtable
👉🏽 How to Automatically Scrape Website Data and Save to Notion (No Code)
And learn more about scraping with Browserbear here:
👉🏽 How to Scrape Data from a Website Using Browserbear (Part 1)
👉🏽 How to Scrape Data from a Website Using Browserbear (Part 2)